
Knitting:
Stacey finished her second Knit One, Crochet Too Ty-Dy Socks in colorway Cherry Cola 1233 sock! Last week she had started the toe decreases, and now it's done, and it fits, and the ends are even woven in.For the second sock, Stacey decided to re-knit the cuff as it was taking forever and was not very fun to pick up the ribbed stitches. From there, the heel turn was completed, with only the three called for repeats this time! Then Stacey attempted to attach the two halves of the sock, while trying to make the stitches look like knitting, which was not working. After seven connected stitches and an hour's worth of crafting time, she gave up and went to work. Later on, she had a thought, isn't this exactly what the kitchener stitch is for? Why yes, it does seem to be. More time was spent ripping this out, and then the kitchener stitching commenced. Kitchener stitching 160 stitches takes quite a long time, but it looks good, and the sock is in one piece!


Woodworking:
Lee decided to use his new jointer and some of the lumber he purchased to make a new end grain cutting board. He made a cutting board in the past that we used quite a bit but it got chopped up a bit too much. He used a program called cbdesigner available at www.lastalias.com/cbdesigner/ to design the cutting board. The wood he is using on the cutting board is hard maple, walnut and padauk.

After jointing and planing and cutting the wood into the correct size strips they are glued together using Titebond III glue. Titebond III glue is one of only a few wood glues that is safe to use with cutting boards.

The next step is to for the boards to be planed down flush again. It's a good idea to use a paint scraper, chisel or putty knife to chip off any of the solid glue before planing. The photo below is of the wood chips from the planer. It's interesting how the different types of wood produce different wood chips. The maple made nice long curls and the padauk and walnut were more like chips.

Now that the boards have been glued and planed we can cut them into strips, rotate them on end and flip then end for end to create the pattern.
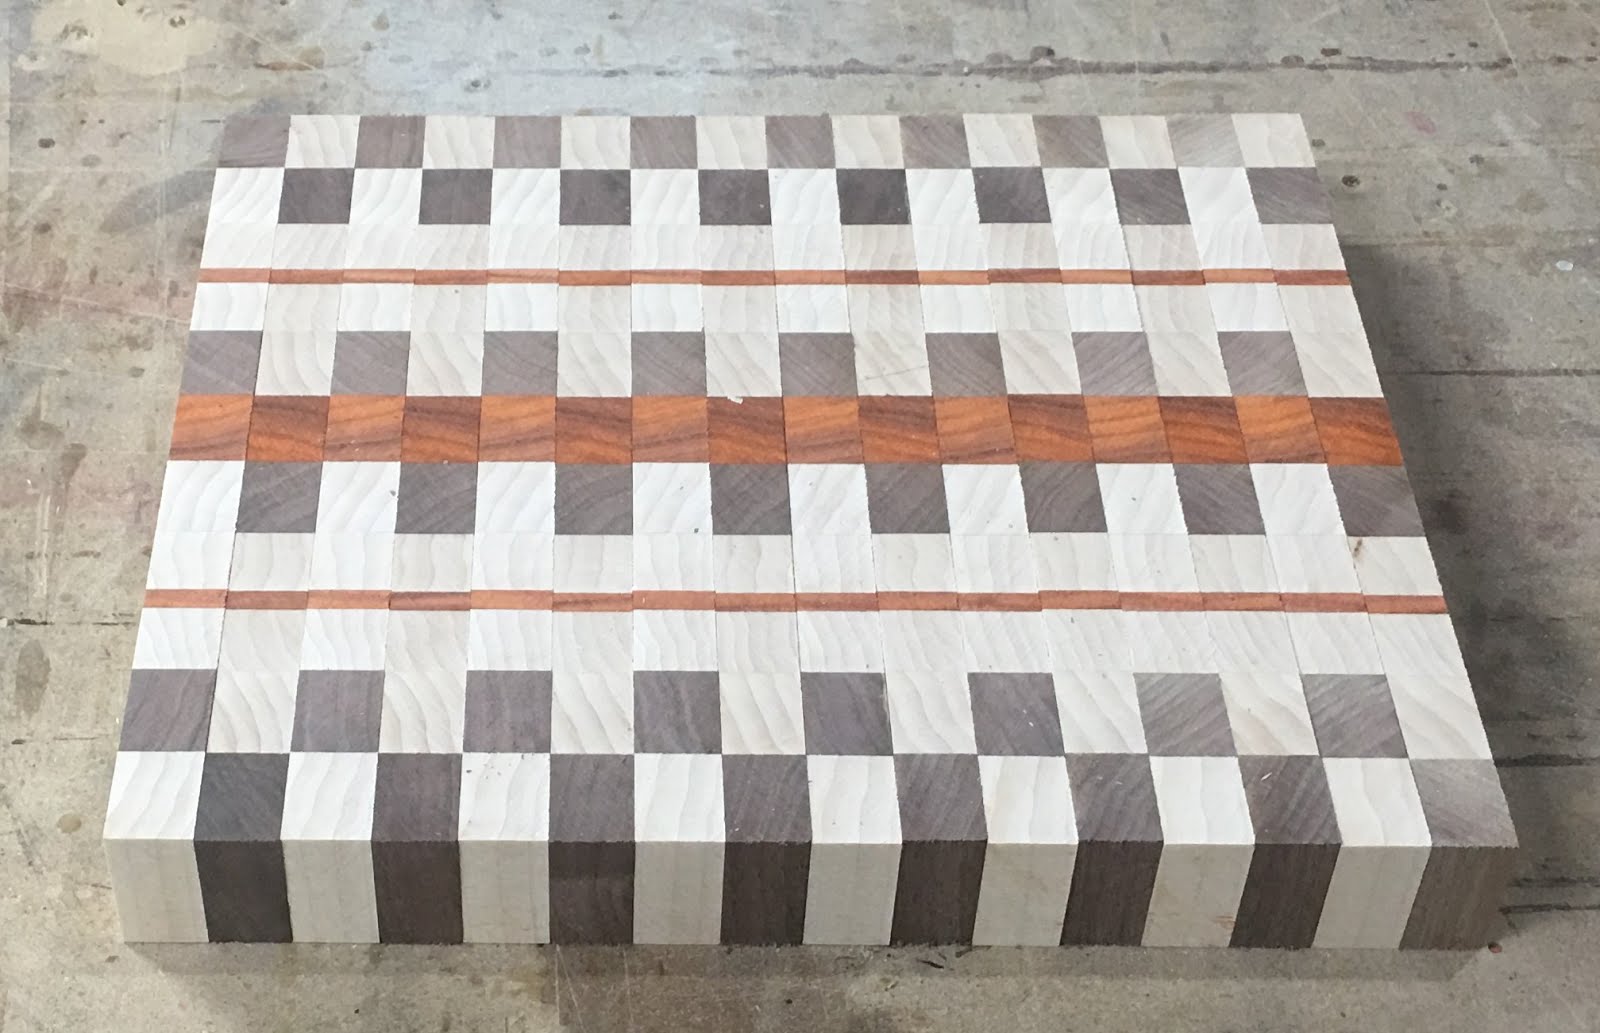
The board was a bit smaller than anticipated so we decided to put a border all the way around. With the border put on it has a nice size and heft to it.

It ended taking around 4 coats of mineral oil and 3 coats of mineral oil with wax in it. We used the Howard brand oil on our board. Lee took a video of him putting the oil on the board. It's widely agreed upon that this is the best part of most woodworking projects, especially when using exotic woods.

No comments:
Post a Comment