Friday, January 26, 2018

The return of woodworking projects and a finished cross-stitch block

This week we have the return of woodworking and a finished cross-stitch block.

Cross-Stitch

Stacey finished the Wizard of Oz block of the 2015 Story Time Sampler pattern from The Frosted Pumpkin Stitchery!

The frame around the Black Beauty block has been started.

Knitting

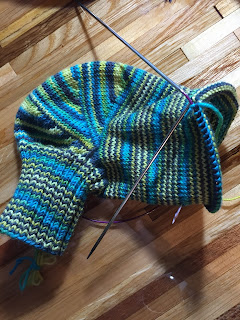
The Twinkle Twinkle Little Vampire socks out of Blue Moon Fiber Arts Socks that Rock Lightweight are still coming along nicely.  You can see the stitch marker where I left off last week.

Woodworking

Lee was able to put together the bookshelf someone had commissioned this past weekend. The only thing left to do is stain the bookshelf to the color the customer wants. 

Lee has wanted a mallet to use in the shop for a while. His current rubber mallet leaves black marks on things it hits. This mallet is based on the Paul Sellers video found here. It has a drop in handle that gets wedged in when you swing it to stay tight. It also pops out when you tap it to come apart and make it easier to fit in a toolbox or bag. 
  

Thursday, January 18, 2018

Jumping on the pressure cooker bandwagon

This week, we borrowed a pressure cooker from Lee's parents, and put it to the test.  We cooked some dry black, red, and kidney beans for our beans and rice recipe, which was definitely less time intensive and was easier to clean up.  We also tested our sticky chicken recipe in the pressure cooker instead of the crock-pot, which came out a bit less tender but still good.  We'll likely continue to use the crock-pot for this dish.  We made some rice, as we've been considering getting a second, larger, rice cooker.  The rice was a little bit more wet than the rice in our rice cooker, but that would probably be resolved with an adjustment to the proportions of water to rice.  We then cooked some ground turkey from frozen with some taco seasoning, which worked, but the meat doesn't have the texture that Stacey prefers, so we'll go back to our normal way of cooking that as well.

Share some of your favorite pressure cooker foods and recipes with us in the comments below.

Knitting:

Stacey has continued working on her Twinkle Twinkle Little Vampire socks out of Blue Moon Fiber Arts Socks that Rock Lightweight.  The foot is coming along nicely, and it has reached the point in which it actually looks like a sock!  Stacey is still loving the striping pattern from this yarn, and has managed to not go out and purchase all of Blue Moon Fiber Arts self-striping yarn.  (Sorry Blue Moon Fiber Arts!)


Cross-stitch:

Stacey has gotten back to the Wizard of Oz block of the 2015 Story Time Sampler pattern from The Frosted Pumpkin Stitchery.  Toto has been added to the block, as has a good amount of the basket and the yellow brick road.  


Thursday, January 11, 2018

Ironing paper, a self-striping sock, and a finished shirt

Happy Thursday!  We hope you've all made it through last weeks crazy weather unscathed.  We've been lucky enough to just have a really cold spell, so we've been rocking our hand knit socks, hats, and scarves earlier in this past week.

Disclosure: We are a participant in the Amazon Services LLC Associates Program, an affiliate advertising program designed to provide a means for us to earn fees by linking to Amazon.com and affiliated sites.  Purchasing items after following a link in this post may provide us with a commission, at no extra cost to you. 

Knitting:

Stacey has continued working on her Twinkle Twinkle Little Vampire socks out of Blue Moon Fiber Arts Socks that Rock Lightweight.  She has managed to only do the three necessary heel turns on the first sock, so hopefully this pair won't be a repeat of the last pair of socks.  The yarn is incredibly sproingy, which is not a real word, but a perfect description.  Stacey is loving the different striping patterns that are coming out in each section of the sock, and is showing a fair amount of restraint in the purchase of many more skeins of Socks that Rock yarn. 

Sewing:

Stacey decided to reconstruct a tee shirt using one of Lee's old and too short tees and her recently acquired Kwik Sew K3766 pattern.  The instructions for the pattern are very well written and easy to follow, but of course, were not followed as written.  As the fabric was coming from an existing shirt, the neckband and sleeves were reused as-is.  Stacey's measurements fall right between the Medium and Large sizes, so she opted to make the Large as she prefers to have a bit of extra room in tee shirts and the fabric has a bit of stretch to it.


This shirt actually came out really well, to our surprise (based on previous clothing sewing attempts, not the pattern!).  This will definitely be used (following all instructions) again, as soon as some more tee shirt fabric is obtained.  If you have any recommendations for comfortable tee shirt fabrics or favorite places to purchase fabric, let us know in the comments.

Just for fun, in case anyone who reads this is just starting out and wants to know that they're not alone, I'm sharing a couple of memorable thoughts from this project.

First, I actually read all of the instructions before I started.  Then I read through them as I went to make sure I didn't miss any steps.  There's a section at the beginning to iron the pattern paper to remove the creases so that you can cut out your size correctly.  My thoughts: Wait, am I really supposed to iron this pattern paper?  *Reread instructions.* What setting do you iron paper with?  Wait, is this paper or some kind of very thin fabric?  *Reread instructions again.*  Ok, lowest setting.  And we're ironing.  (a few minutes pass)  Gah, this is taking forever.  Second iron setting.  (a few more minutes pass)  Hmm, I guess that worked.

My second and third thoughts: Noooooo, I ran out of thread! and Really, I ran out of thread again?

Thursday, January 4, 2018

Happy 2018

We hope everyone had an awesome holiday season!  We did a bit of traveling, so had limited time and resources to devote to crafting, but here's what we were able to accomplish since the last blog post.

Sewing:

Lee's winter coat developed a nice big tear under an arm, so Stacey patched that up.  

Knitting:

Stacey started another set of socks using the Sweet Tomato Heel and the Asymmetric Wedge Toe, as her Hermione's Everyday Socks and Knit One Vanilla Socks fit really well.  This yarn for this pair is Blue Moon Fiber Arts Socks that Rock lightweight in the Twinkle Twinkle Little Vampire colorway.  She did decrease down to 72 stitches to make the socks a little bit snugger around the foot.

Soapy Goodness:

While on vacation, Stacey was lured into some shops by some adorable soaps, bath bombs, and other skincare products.  With an awesome bath tub in our hotel room, she decided to try the Detoxify your Mind bath bomb from Nectar Bath Treats, which was quite nice and very moisturizing, so on another expedition out, a Brightside Bubble Bar and Dragon's Egg Bath Bomb were purchased from Lush.  With the fancy jets in the hotel bath, the bubbles from the bubble bar were awesome.  Upon our return home, a bath bomb making session was in order.  We made a batch of bath bombs in an ice cube tray and used a Grapefruit Bellini fragrance oil for them.  We also made some Grapefruit Bellini scented sugar scrub for an extra decadent bathing experience. 


Thursday, December 21, 2017

Happy Holidays!

This will be our last post for this year, as we're going to be spending much of our time between now and the beginning of 2018 with family instead of being holed up in our crafting spaces.  We're hoping to continue the weekly posts after the holidays for our six regular bots to enjoy.  (If  you take offense at being called a bot, please leave us a comment to let us know!)

Knitting:

Stacey finished her second  Knit One, Crochet Too Ty-Dy Socks in colorway Cherry Cola 1233 sock!  Last week she had started the toe decreases, and now it's done, and it fits, and the ends are even woven in.

For the second sock, Stacey decided to re-knit the cuff as it was taking forever and was not very fun to pick up the ribbed stitches.  From there, the heel turn was completed, with only the three called for repeats this time!  Then Stacey attempted to attach the two halves of the sock, while trying to make the stitches look like knitting, which was not working.  After seven connected stitches and an hour's worth of crafting time, she gave up and went to work.  Later on, she had a thought, isn't this exactly what the kitchener stitch is for?  Why yes, it does seem to be.  More time was spent ripping this out, and then the kitchener stitching commenced.  Kitchener stitching 160 stitches takes quite a long time, but it looks good, and the sock is in one piece!


Woodworking:

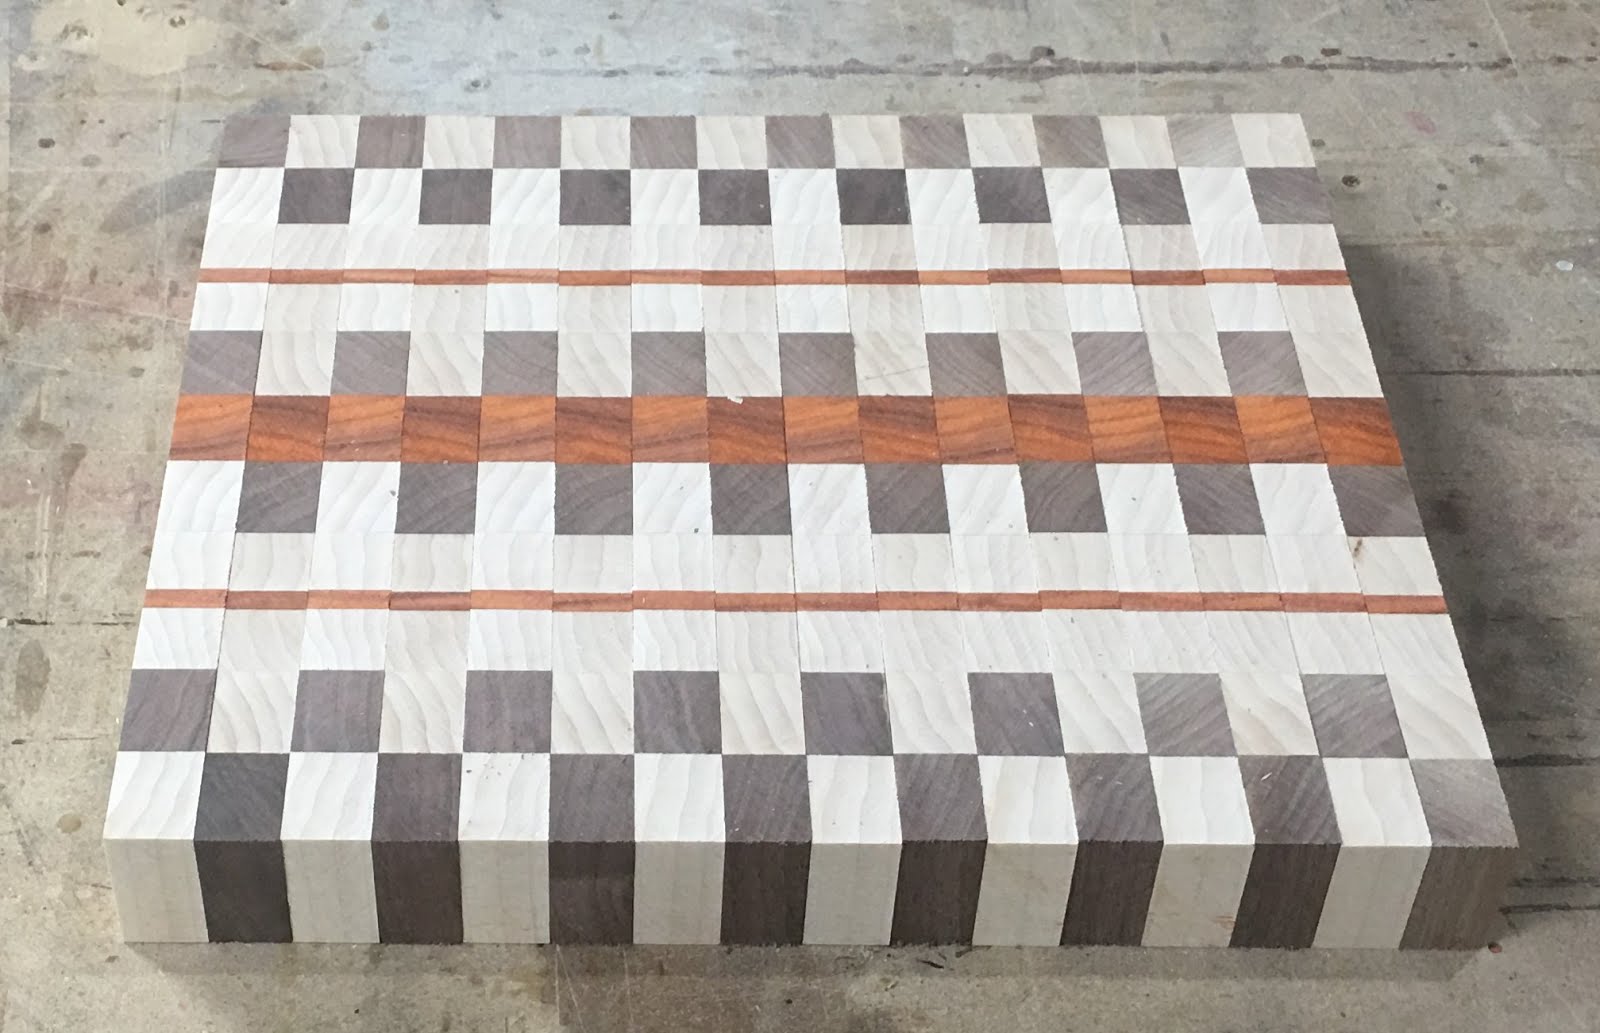
Lee decided to use his new jointer and some of the lumber he purchased to make a new end grain cutting board. He made a cutting board in the past that we used quite a bit but it got chopped up a bit too much. He used a program called cbdesigner available at www.lastalias.com/cbdesigner/ to design the cutting board. The wood he is using on the cutting board is hard maple, walnut and padauk.


After jointing and planing and cutting the wood into the correct size strips they are glued together using Titebond III glue. Titebond III glue is one of only a few wood glues that is safe to use with cutting boards. 


The next step is to for the boards to be planed down flush again. It's a good idea to use a paint scraper, chisel or putty knife to chip off any of the solid glue before planing. The photo below is of the wood chips from the planer. It's interesting how the different types of wood produce different wood chips. The maple made nice long curls and the padauk and walnut were more like chips.


Now that the boards have been glued and planed we can cut them into strips, rotate them on end and flip then end for end to create the pattern. 


The board was a bit smaller than anticipated so we decided to put a border all the way around. With the border put on it has a nice size and heft to it.


It ended taking around 4 coats of mineral oil and 3 coats of mineral oil with wax in it. We used the Howard brand oil on our board. Lee took a video of him putting the oil on the board. It's widely agreed upon that this is the best part of most woodworking projects, especially when using exotic woods. 


Thursday, December 14, 2017

All the sewing...

This week was dominated by Stacey's sewing projects.

Sewing:

Cross-back apron for Lee:

Stacey spent the weekend sewing up a storm.  She started with the cross-back apron mentioned last week for Lee, who had chosen this awesome Tula Pink Spirit Animal Lunar Otter N Chill fabric (affiliate link), which we have dubbed Space Otter.  The apron was super simple and straightforward to cut and sew and will work perfectly.


Tote bag:

Her next project was a Whistlepig Creek Productions #1144 Six Pack Stack Reversible Fat Quarter Tote, which has been gifted, and should have been received by the intended recipient.  The pattern was purchased from a local-ish quilt and knitting shop back in 2014, and was used in the first sewing class Stacey participated in, marking the start of her sewing adventures.

It is supposed to coordinate with a dark purple luggage set with bright blue and hot pink circles.  We're hoping that this goes well enough.  It was a bit of a struggle to find fabrics in the right color ranges, as they aren't the currently popular shades, but the proprietor of our local quilt store was extremely helpful in finding these fabrics.  I tried to offset the colors a bit to make the bag not seem to crazy, so the bright blue is on one side, and the pink is on the reverse.  The purple and black fabrics are a bit more mellow, so they are on both sides.


Stacey stopped paying attention while cutting at one point, and cut the pockets the wrong way in the fabric so they ended up shorter than the pattern called for.  The same thing happened with the straps.  She likes the look of the slightly shorter pockets, that seem to take up half the depth of the bag.  The handles are definitely still usable, but a few more inches on them would probably be better.

She also cut the corners at the bottom to make the box shape a little bit too large, a misreading on her part.  This error actually lines up the bottom of the pockets with the bottom of the bag when it is standing up, which has been perceived as a vast improvement in the look of the bag.


The bottom seam where the bag was turned right sides out was hand-stitched using the ladder stitch technique.  Look at this, you almost can't tell it was hand-sewn!  This shows a marked improvement in Stacey's hand-sewing technique since she started sewing a few years ago.

Stacey's cross-back apron:

Stacey then worked on her own cross-back apron, which she managed to cut out with the print upside down.  C'est la vie.  There wasn't enough fabric left to cut it out again, and it's just going to get messy in the kitchen anyway, so she just went with it.  Since the project was already mucked up, Stacey decided to try out some different stitches on the various seams of the apron.  The bottom hem was just a straight stitch.  The outside seams were done with the seam/overlock setting.  The armhole curve and inside strap seams were done with an S curve stitch pattern, which, in hindsight, may not have been the best idea as the clipped edges in the curve are not fully sewed down.  That can and will be fixed if needed in the future.  The top front seam was done with a rolled hem to encase the edge.  All-in-all, it fits and it'll hopefully prevent some clothing stains from kitchen messes, exactly as intended.

Slouchy headwarmer:

The next sewing project this week was the Patterns for Pirates Slouchy Headwarmer, which is one of their 2017 Holiday Freebies.  Stacey whipped this up out of remnants of the girl scout green lycra.  This project took about 20 minutes, including the hand-stitching at the end.  This is a super easy and versatile project, as it can be worn as a headband, hat, messy bun hat, or a cowl.  As usual, the tutorial from Patterns for Pirates is excellent.

Knitting:

Stacey continued working on her second Knit One, Crochet Too Ty-Dy sock in the Cherry Cola 1233 colorway, and managed to get to the toe decreases.  The stitch-marker is where the sock was last time it made it into a blog post.

Cross-stitch:

Dorothy now has a dress, and there's a rainbow on the Wizard of Oz block of the 2015 Story Time Sampler pattern from The Frosted Pumpkin Stitchery.

Woodworking:

Lee spent some time in the workshop making a new crosscut sled. The old one went with the table saw it fit when he returned it to his father. The new crosscut sled has some improvements over the old one. This one features a stop block with a tape measure, two T slot tracks and an insert where the blade meets the front rail. The stop block is used to make accurate repeatable cuts without having to markup and measure each piece. The two T slot tracks can be used to clamp your material to the sled so you don't have to hold onto it or to attach a miter gauge that can be used to cut angles. Lastly, the replaceable inserts are used to get a clear view of where the blade will cut. When lining up your material to be cut its important to know where the blade will hit the front rail, the old sled got a little worn out which led to not knowing where the blade would cut without lining up each piece to the blade itself. Now if it gets a bit off, the insert can simply be replaced. 

Thursday, December 7, 2017

A sock in pieces and a shed

This week we put a lot of our crafting time towards projects to make our lives easier.  Stacey has been watching The Great British Sewing Bee while she works on her cross-stitch project, and Lee has been watching Star Wars - The Clone Wars while playing video games and watching woodworking videos.

Disclosure: We are a participant in the Amazon Services LLC Associates Program, an affiliate advertising program designed to provide a means for us to earn fees by linking to Amazon.com and affiliated sites.  Purchasing items after following a link in this post may provide us with a commission, at no extra cost to you. 

Cross-stitch:

Stacey finished the top banner and the frame for the Wizard of Oz block in the 2015 Story Time Sampler pattern from The Frosted Pumpkin Stitchery.

Knitting:

Stacey continued to try to fix her first Knit One, Crochet Too Ty-Dy Socks in colorway Cherry Cola 1233 sock.  She decided that ripping back short rows is not fun, and picked up the stitches from the cuff and the stitches from the foot, and removed all of the heel rows in the middle.  While this took quite a bit of time, the sock looks salvageable again.  Yay!

Sewing:

We are constantly searching for towels to wipe our hands on in the kitchen.  We'll go to grab one we put down two minutes ago, and poof, it's not there.  Where is it?  On the other side of the kitchen or on the other person's shoulder.  The worst part is that we normally have three kitchen towels floating around at any given point.  The solution to this problem is not more towels of course, but to make aprons that we can wipe our hands on that are attached to our bodies so they can't grow legs like those pesky towels.

Stacey likes the look and the idea of the currently popular cross-back apron, so she decided that is what she would make.  After lots of sorting through useless pins on Pinterest, and attempting to mock up her own version, she came across Cynthia Fong's Linen aprons for the whole family pattern at fabrics-store.com.  Ann Martinson's comment on the post helped her figure out how the apron is supposed to fit, and she determined that the adult size listed would work for her.  Lee, being 6' tall, needs some adjustments to have the apron fit, which was easily done based on Ann's explanation.

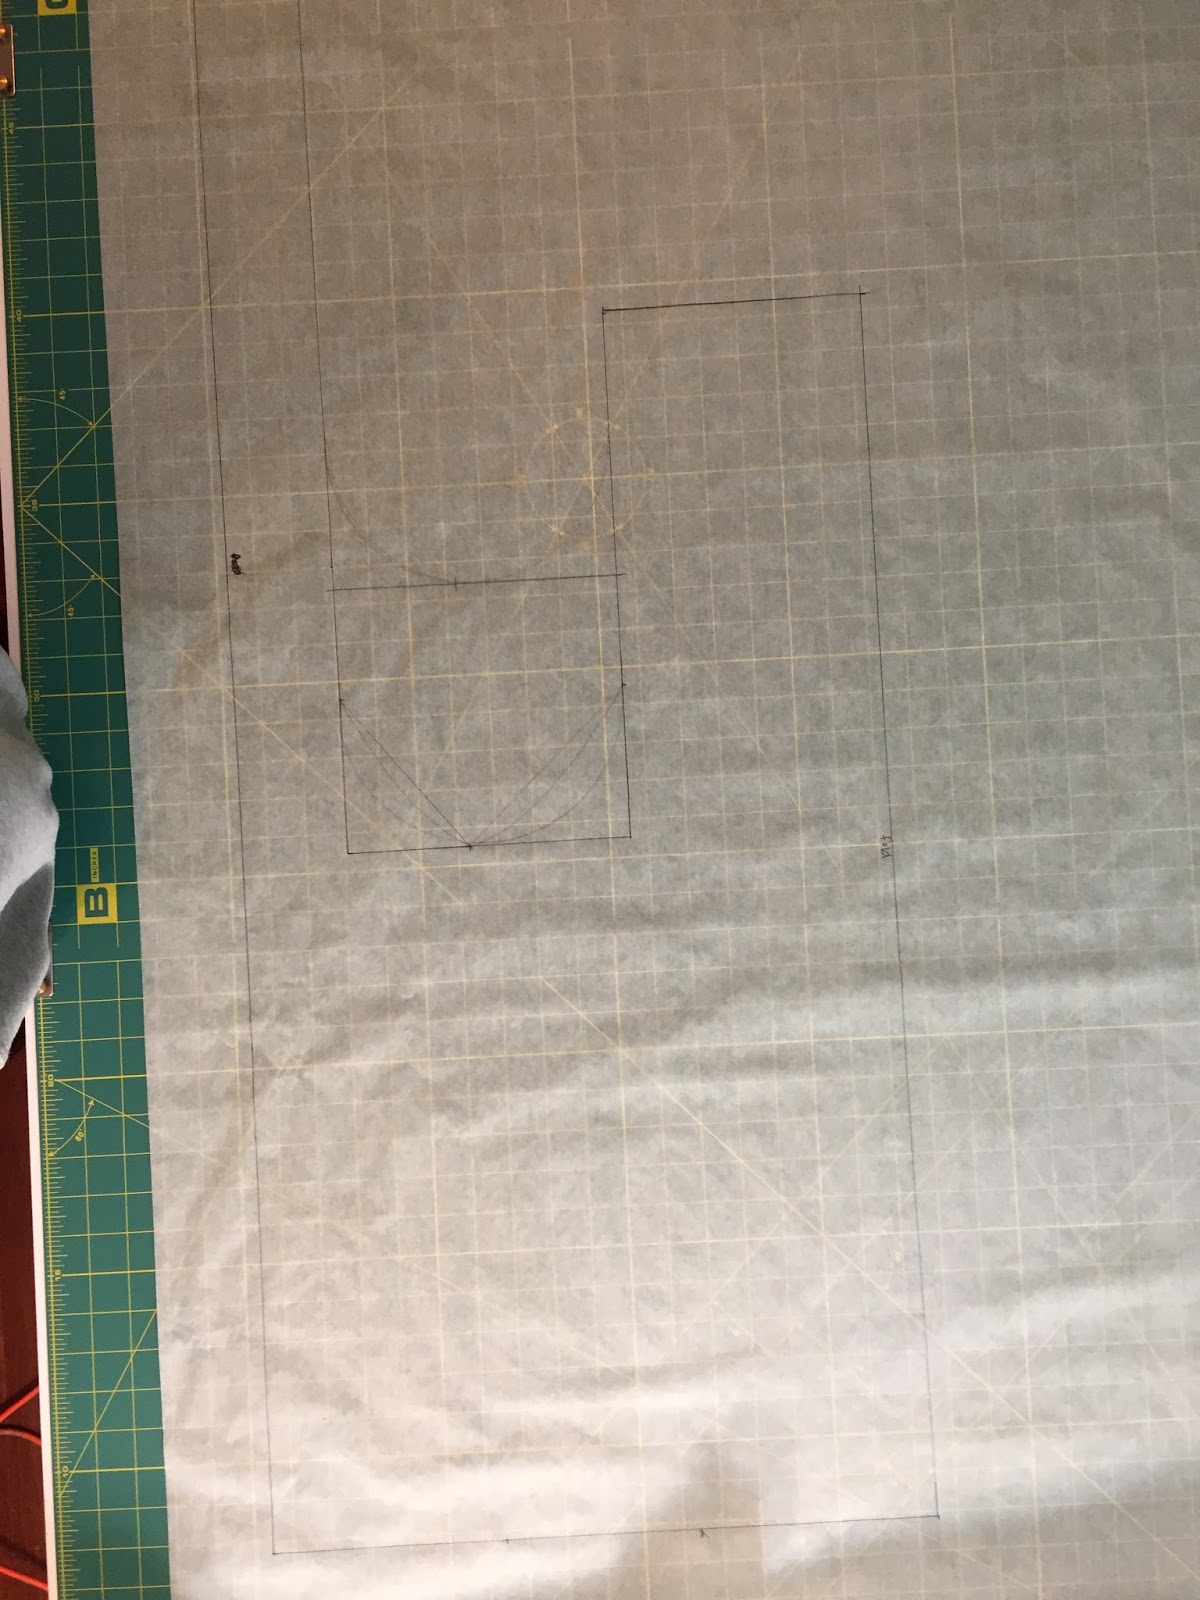
Here are our drafted patterns, drawn out on tracing paper.  Aside from the adjustments made for Lee's apron, both also had the armholes raised up by 7", as we're not fans of low cut armholes.


Maybe next week we'll have one or both of the aprons finished to show you.

Woodworking:

While not specifically woodworking, our next project was woodworking-adjacent.  We assembled a shed in the back yard to store the lumber cart and other things that simply take up too much room in the garage workshop but are still needed, and should be nearby.  Saturday was a balmy fifty-ish degrees (as long as you were in the sun, which we were not), so we figured it was the perfect time to get this done before winter fully kicks in.