I have had a cardboard box under my desk at work for about 3 years acting as my footstool. It has been taped up a few times to try and help it hold its shape, but the time has come to replace it with a proper footstool.
I had a left over piece from another project that was about 12 inches wide. I used this to trace out the 2 base pieces, the center spacer, and the top board.
Here you can see the 4 pieces all cut out. I used the table saw to cut the board into 4 pieces. After that I used the band saw to cut out the pattern on the base pieces.
A little trick I picked up online watching videos was to use some double sided sticky tape to put the two base pieces together, then sand them at the same time. This makes sure that the pieces come out to be the same size after sanding.
After sanding all of the pieces down a bit, I applied a Minwax Provincial stain to all 4 pieces.
I had pre drilled two holes on either side, and four on the top after clamping up the stool and verifying that everything was square and flat. Then I put all of the screws in by hand to make sure that I didn't strip any of the holes out.
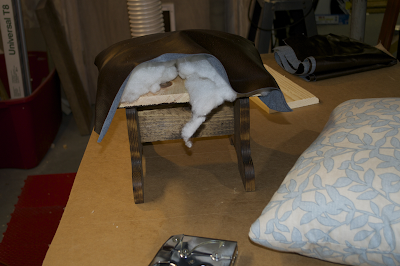
To assemble to top of the stool we used some leather we had salvaged off an old chair, and some stuffing from a pillow that is never used.
Below are 2 finished pictures of the stool. Overall the stool was very easy to make and only took about 2 hours all together, not counting drying time.


No comments:
Post a Comment