Sunday, June 28, 2015

Photo Shelves

Since I "borrowed" most of my Dad's tools to start woodworking, he asks me to make some stuff for him from time to time. Recently he needed some photo shelves made to hang some photos on the wall. The idea is pretty simple, get 3 pieces of trim/moulding and create an L shape that the photos can sit in without sliding off the shelf. 

In this picture you can see the 3 pieces of wood that we have. A tall piece for the back with a little detail at the top, a simple flat piece for the bottom and a small piece for the front again with a little detail at the top.


The pieces of wood that I was working with here were slightly warped/bowed so I used glue and nails to hold them together while trying to straighten them out a bit.


I used some 1 1/4 inch nails in the back to nail the pieces together. I started from one side and worked my way across straightening the pieces out as I went along.


I used the same process on the front, glue and nails. I tried to go wider on the spacing with the nails on the front since the piece is smaller and it made for less to fill in after. I used a punch to put the heads of the nails a bit below the surface of the wood. Then I used a bit of wood filler to fill those holes on the front. There is no need to do this on the back since it wont be seen.


I made four shelves all at the same time, which took about 2 hours all together for the assembly, sanding and staining.


My dad wanted something dark like this to go on his wall, I used Minwax Provincial stain.


Here is what they look like mounted on the wall with some photos in them. I think they came out alright and it was definitely cheaper to make these then to buy something similar.


Sunday, June 21, 2015

Workshop Apron

Have you ever noticed how difficult it is to get wood chips and saw dust out of fleece sweatshirts?  Hopefully not, but I can tell you, it's no fun.  Since Lee wears lots of fleeces, and he likes to spend some of his spare time in his workshop making wooden things, this is becoming quite the annoyance.  So we decided that he needs an apron for his workshop.  We went to JoAnn Fabrics and picked up a pattern, Simplicity 1512A, and most of the necessary materials.  We did have to place an Amazon order for the grommet tool.


After washing the fabric and pressing it, I copied the pattern pieces to tracing paper.


Then I cut out the pieces, which went well until the last piece.  Which I cut wrong.  Fortunately I caught this mistake quickly, when I compared it to the matching piece.  Apparently I lined the pattern piece up with the fold, just not the side of the piece I was supposed to.


I must have temporarily forgotten what those huge arrows represented.  I must have also forgotten how to read my own handwriting that specifically states what those arrows represent.  I really should stop working on projects after the time I normally go to sleep.

Anyway, I recut the piece.  While doing so, I didn't pay attention to the piece of fabric I had grabbed, and it had already been partially used.  This time it was the right shape, but had a whole corner missing.  Ugh.


I'm really glad I bought more fabric than I needed for this pattern.  I finally managed to pay enough attention to get it right and I was able to transfer the necessary markings.  At this point, I decided to go to bed, as I'm quite certain ripping seams because I'm too tired to think straight would not make me happy.

Sleep turned out to be a good decision.  Hemming went smoothly.  I followed through the assembly steps for the pockets and the little D-ring tab with no issues.

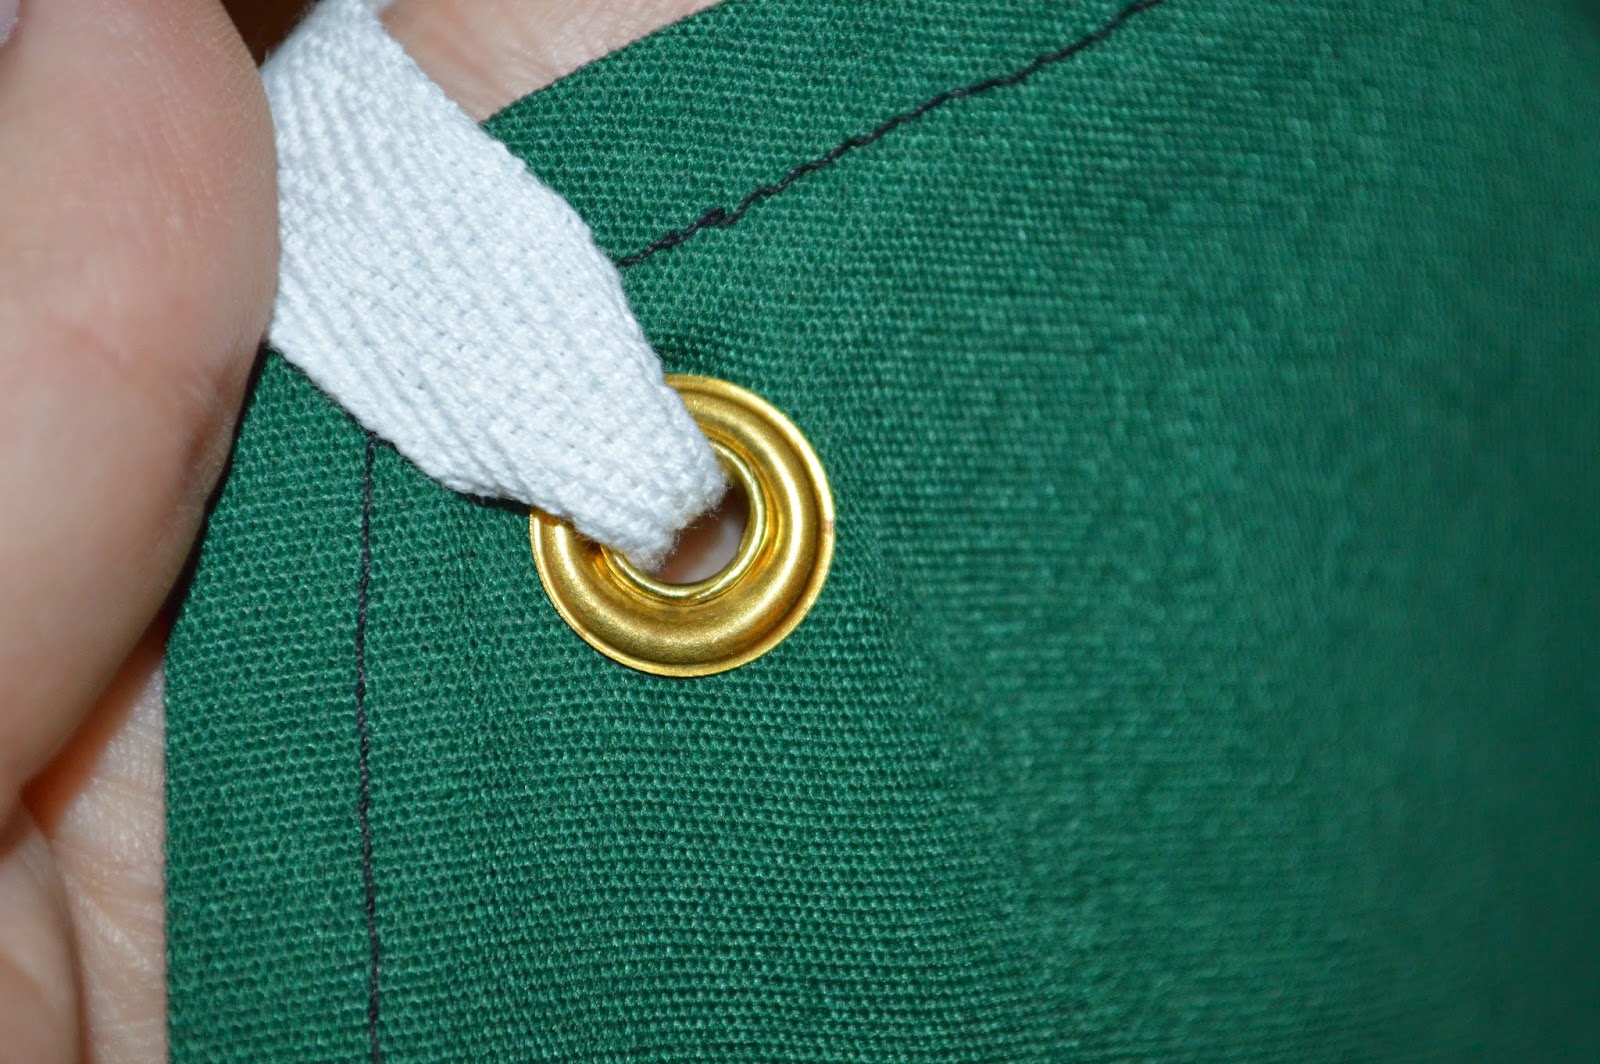
Lee assisted with the grommets, and the ties were added.


All things said, I think it came out pretty well.  


Lee seems pretty happy about his new workshop apron.


Sunday, June 14, 2015

My 15th Handmade Hat

I just finished (at the time of writing) my 15th handmade hat.  I enjoy knitting hats, more than any other knitting project type that I've attempted so far.  Each hat I've made makes me love knitting hats a little bit more than I did before.  I'm guessing there is an upper limit to how much I can love knitting hats, but I don't think I've reached that point yet.

This most recent hat used the Christian's Hat pattern by Ágnes Kutas-Keresztes.  I adjusted the pattern slightly by increasing the stitch count to fit our large heads.  The hat was knit out of Caron Simply Soft Solids in the Ocean 9759 colorway, which is such a vibrant, jewel toned blue that I absolutely adore.  While this is an acrylic yarn, and I'm kind of a yarn-snob, I really enjoy the feel of this yarn, which is why I have a decent amount of it in my stash.  


I used Jeny's stretchy slipknot cast-on, which is amazing.  It did take a few tries to get the hang of it, but it was so very worth it.  I love how this cast on fits in with the ribbing and how stretchy it is.  Some of my earlier hats were not stretchy enough in the cast on, which kept them from fitting well.  This will be my standard cast on for hats from now on.  


The directions for the pattern are very well written, and the texture of the hat makes me happy.  It knit up pretty quickly, as long as I was actually knitting on it.  I watched episodes of Stargate SG-1, Stargate Atlantis, and the Junkyarn Podcast while knitting this.  The pattern was easy enough that I could pay attention to what I was watching without messing up, but was still interesting enough that I would find myself still knitting on it ten minutes after an episode ended and I needed to turn on the next one.  I think this may be another hat pattern that I make more than one of.

Sunday, June 7, 2015

Brick Cutting Board

When I first thought about starting woodworking, one of things that drew me to the craft was cutting boards. I love the look of some of the handcrafted cutting boards, so I decided to start making one out of the spare hardwood that I had laying around. 

I think my favorite cutting boards that I have seen are the brick pattern ones. They take a bit of work and I probably should have started with something a bit more simple, but hey, what the heck, right?

Here is the wood I am going to use for the cutting board. 4 pieces of oak that a work buddy gave me (had to do a bunch of planing, the oak was barn wood) and 2 pieces of what I think is cherry from a pallet. 

Here are some of the oak boards that I had ripped after planing.

Made a bunch of Cherry strips to make the brick pattern.

Here is the first step of making the brick pattern.

Everything is glued up and clamped. You can never have too many clamps.

Step two of making the brick pattern is to cut everything going the opposite way.

After cutting your new strips just stagger them off the center line back and forth. Its hard to see here but I actually messed up just a bit. The last four strips on the left side are not quite aligned right. The mishap here really isn't a problem and you'll see why later.

I didn't have a good way to trim up this board, so I ended up making Jay Bates Multi Function Table Saw Hold Down Jig. This hold down jig is very handy, I should have made it much sooner. I trimmed up the length first.

The reason that having four boards off centered is not really a problem is that I wanted to make two cutting boards from this piece, one regular cutting board and one lime/cheese board.

Then I trimmed up the width next.

After the boards were cut to size I used a belt sander to mow down the cherry strips. One thing I learned from this experience is to try and get things closer to the same size before gluing them together. It would have been much easier to just throw this thing in the planer, but I didn't want to do that until the board was roughly the same height.

I don't have any pictures of the pieces coming out of the planer, but they came out pretty nice.

The next step was to cut the shape out for the lime board and then round over both sides on my router.

The handle fits my hand really well, however I'm a fairly large guy.


My wife had a hard time using it. I decided to add a hole, both to hang from and to make it easier to hold.

I did a bunch of sanding starting at 80 and ending up at 220 grit sand paper. I purchased some mineral oil and mineral oil with wax from Menards.

This is the board after the first coat. It got two more of just mineral oil and one of the mineral oil with wax.

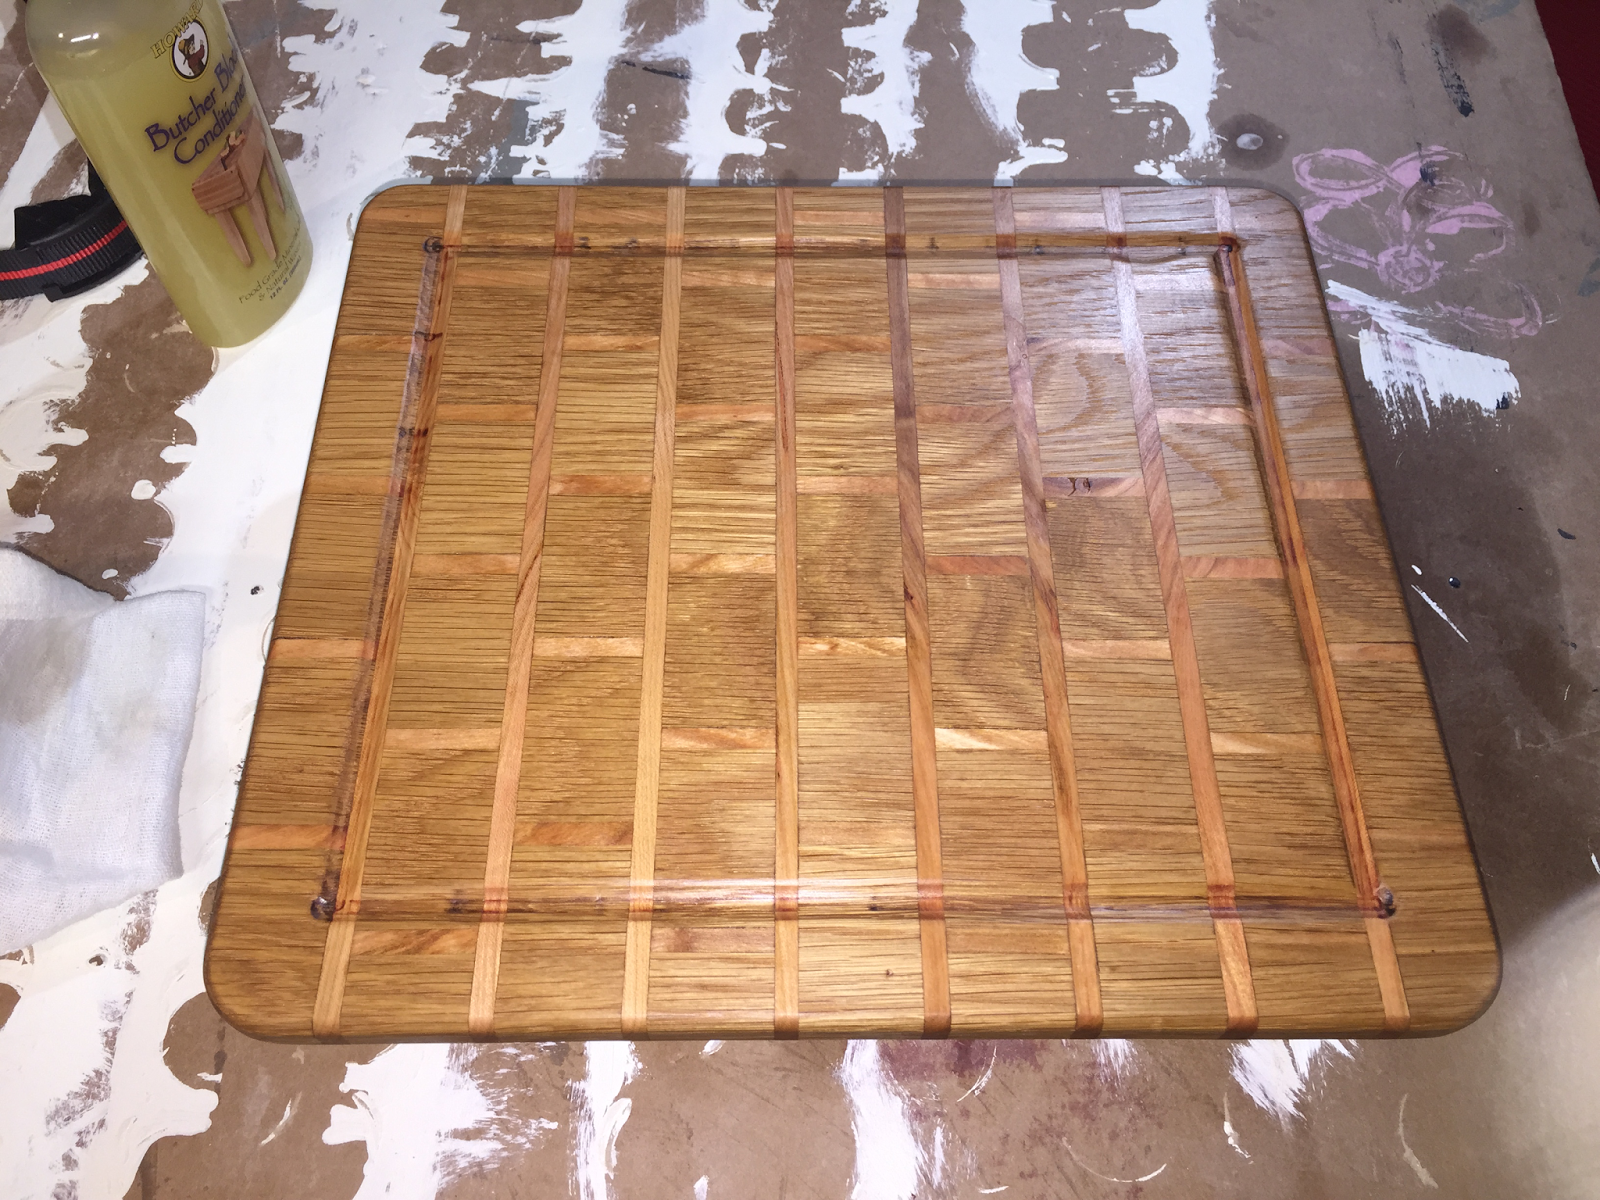
Here is the larger board. I rounded the corners and ran a round over bit around the edges. I didn't go as heavy with the router on this as I did with the lime board.  I also routed in what I'm going to call a juice catcher. It didn't come out exactly like I had planned. The router got away from me at one point and the vertical grooves go a bit farther than the horizontal.

This board got the same treatment as the lime board, three coats of mineral oil and one of mineral oil with wax.

Sunday, December 14, 2014

Executive Footstool

I have had a cardboard box under my desk at work for about 3 years acting as my footstool. It has been taped up a few times to try and help it hold its shape, but the time has come to replace it with a proper footstool. 

I had a left over piece from another project that was about 12 inches wide. I used this to trace out the 2 base pieces, the center spacer, and the top board.


Here you can see the 4 pieces all cut out. I used the table saw to cut the board into 4 pieces. After that I used the band saw to cut out the pattern on the base pieces.

A little trick I picked up online watching videos was to use some double sided sticky tape to put the two base pieces together, then sand them at the same time. This makes sure that the pieces come out to be the same size after sanding.


After sanding all of the pieces down a bit, I applied a Minwax Provincial stain to all 4 pieces.


 Here are all of the pieces drying.


I had pre drilled two holes on either side, and four on the top after clamping up the stool and verifying that everything was square and flat. Then I put all of the screws in by hand to make sure that I didn't strip any of the holes out.

To assemble to top of the stool we used some leather we had salvaged off an old chair, and some stuffing from a pillow that is never used.


Below are 2 finished pictures of the stool. Overall the stool was very easy to make and only took about 2 hours all together, not counting drying time.


Sunday, November 23, 2014

Recent Pinterest Inspired Projects

Oh, Pinterest.  I keep venturing out to that land of wasted time.  The inspiration has kept me crafting though, so I think it makes up for all the time spent looking at adorable puppy and kitty pictures.

My first Pinterest inspired project was a soap pouch.  The tutorial I found was from Nikki at Whimsy Love.  I cut one pouch from a washcloth we already had and assembled it according to the tutorial.  Or mostly according to the tutorial.  The washcloth wasn't actually long enough (about an inch too short), so I fudged it a bit with the size of my seams and stuff.  Which didn't actually work.  Not enough fabric appears to continue to be not enough fabric.  Who knew?  :)


So I then squared up the remainder of the towel and used the principles from the tutorial to make a pouch that enclosed the soap widthwise instead of lengthwise.  But I didn't really measure it against the bar of soap I was using, so it's quite a bit too big for the little bar of soap I have lying around.


This one could work with some handmade soap, like Belmont Botanicals Lemongrass soap from Belmont Market in Wakefield, RI.  Oh, do I love that soap.  Or I suppose I can just unstitch my work, trim the fabric, and stitch it up again.  I don't think that's going to happen though.  I do think I will make a few more of these in the future, hopefully from a different towel and with the right measurements.

I then searched Pinterest for a fabric bin to use when picking up some of the random stuff that somehow ends up in the wrong room all the time.  I used Brett Bara's Oilcloth Storage Bin tutorial to make my bin, with one big modification.  I used cotton fabric for the outside and the lining, so it isn't super sturdy when it's sitting empty.


This took away some of the extra steps required when using oilcloth, but if I make another one I may pick some up to use.  I didn't see anywhere in the tutorial that the bag is reversible, probably because the oilcloth would normally be used on the outside, but with two layers of cotton it is perfectly reversible.  The way the bin is assembled, every seam is hidden except the last line of stitching that connects the two layers.  This bin was made from the same fabric as the zippered pouch I made a few weeks back.


The next Pinterest project was the Adult Seat Belt Travel Pillow.  I had come across other pins for the same pillow, but the links to the original project on pineapplemamalovescloth.blogspot.com all seem to be dead.  Since this pin includes the directions, I used it to create the pillow.  The instructions are very clear, and it only took about half an hour for me to make, including the time spent looking for a pillow that was already partially de-stuffed.  The pillow turned out great, and will probably be greatly appreciated during our upcoming trip to Tennessee.  I think I'll make another one too, so Lee and I both have one, in case we end up sleeping at a truck stop during future trips like we have in the past.


I have a feeling this won't be the last of my Pinterest inspired makes.  I'll try to actually take pictures of my progress for future projects instead of just finished objects.  Maybe I'll have some original ideas to post too.